View All Roles
Roles are configured to manage access permissions on the platform. You can create multiple roles for users, enabling tailored access according to their specific tasks. Users assigned a role will have access to the options associated with that role. In the Roles section, you can see the list of existing roles, review all bookmarked Roles under Bookmark, and add, edit, or clone roles.
Perform the steps below to navigate and view the Roles section:
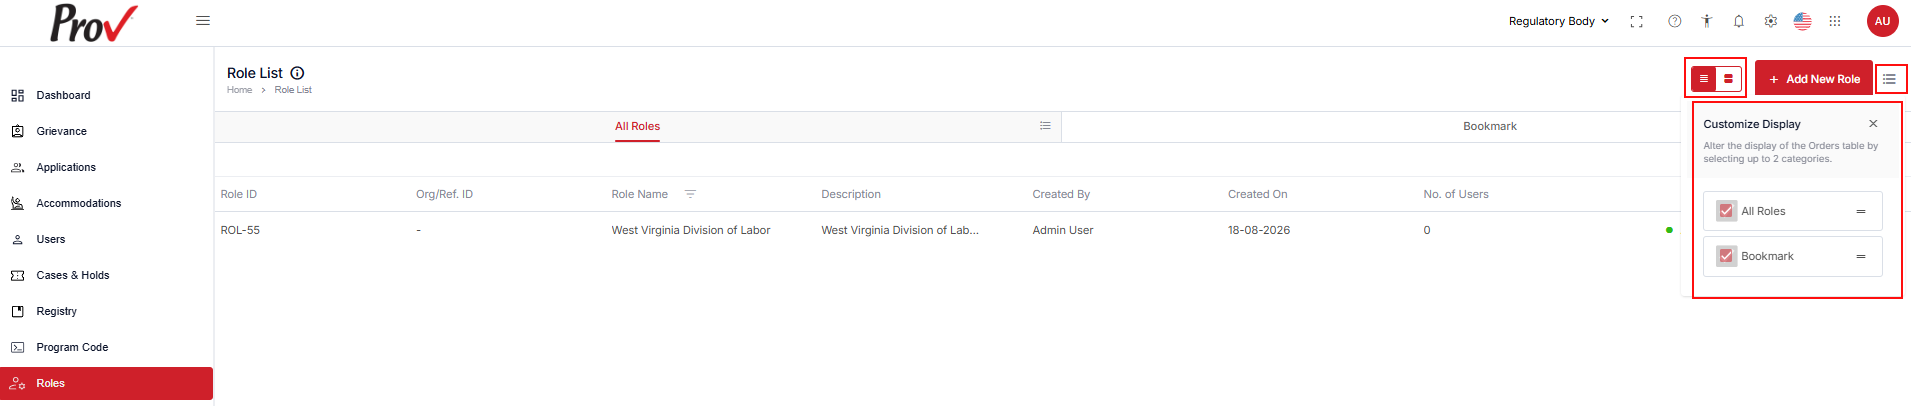
- Click the Left Navigation Menu and select Roles. The Role List is displayed in the table view and comprises two tabs: All Roles and Bookmark.
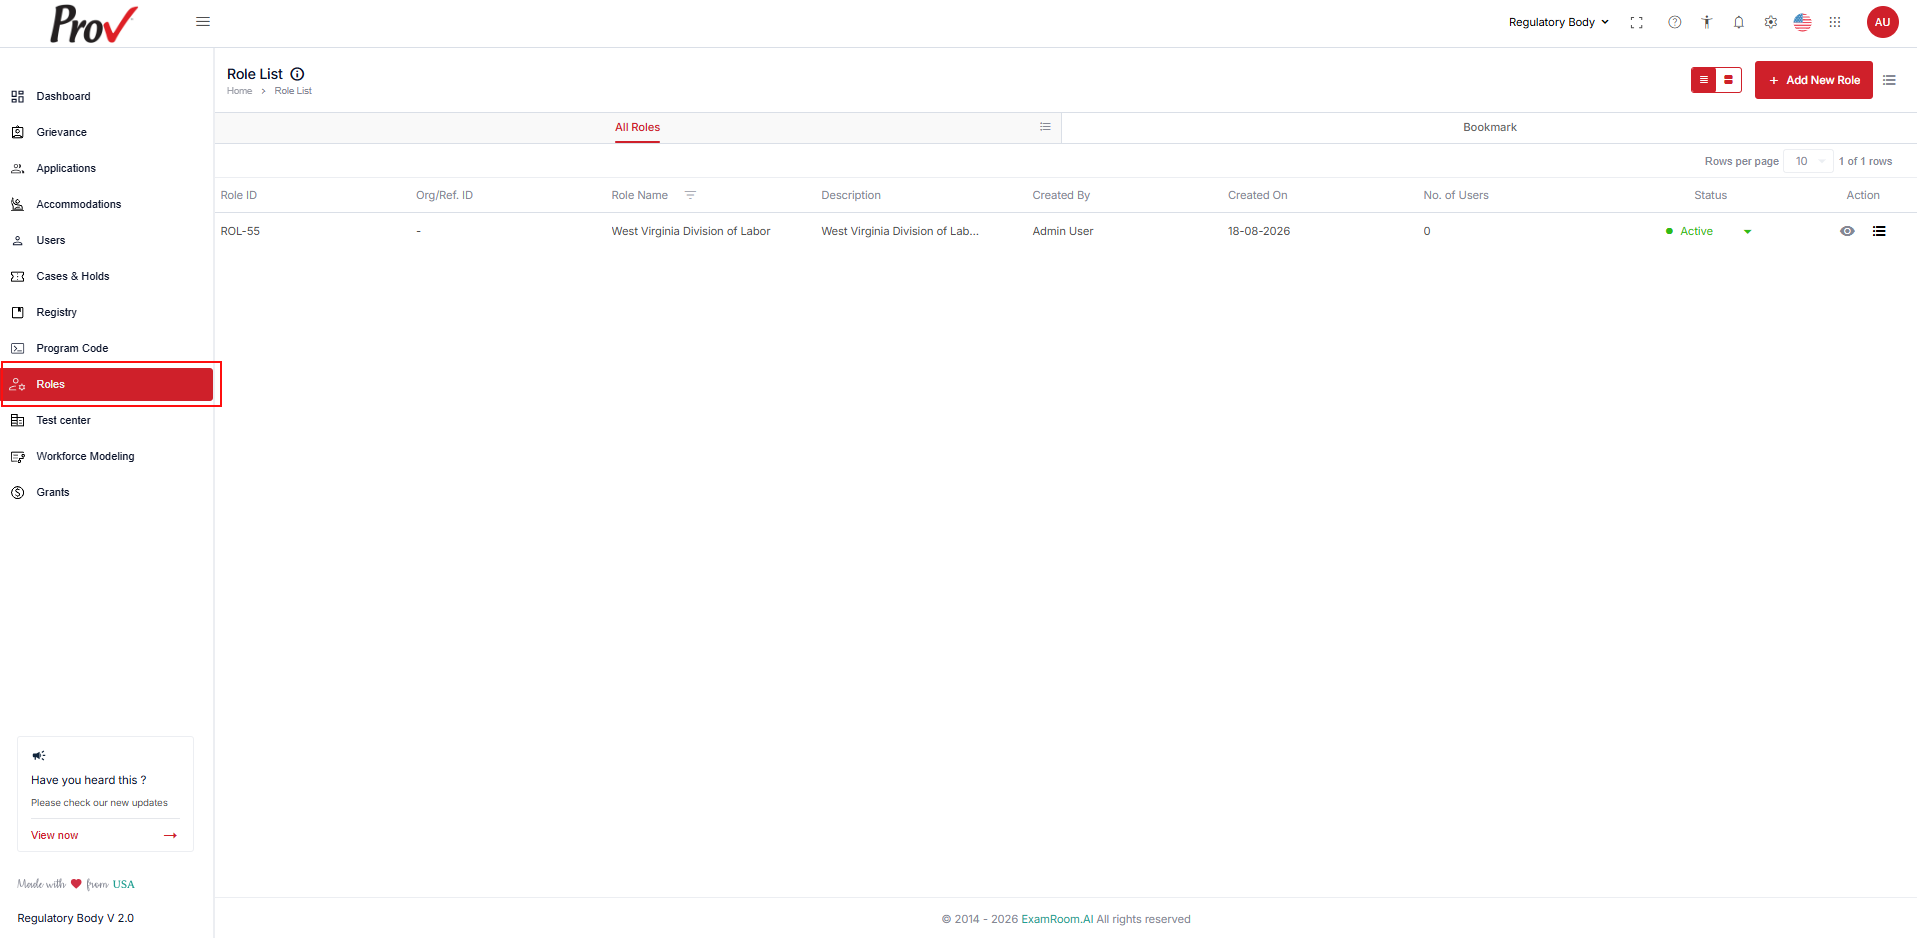
The All-Roles section displays the list of all the assigned roles.
The All-Roles tab displays roles in a table with key information. Below are the details displayed in the table to identify the listed roles:
- Role ID: Displays the system-generated ID for the role.
- Org/Ref. ID: Displays the organization or the reference ID.
- Role Name: Displays the name of the role.
- Description: Displays a short description of the role.
- Created By: Displays the information of the user who created the role.
- Created On: Displays the information about the date when the role was created.
- No. of Users: Displays the number of users assigned to the role.
- Status: Displays the status of the role.
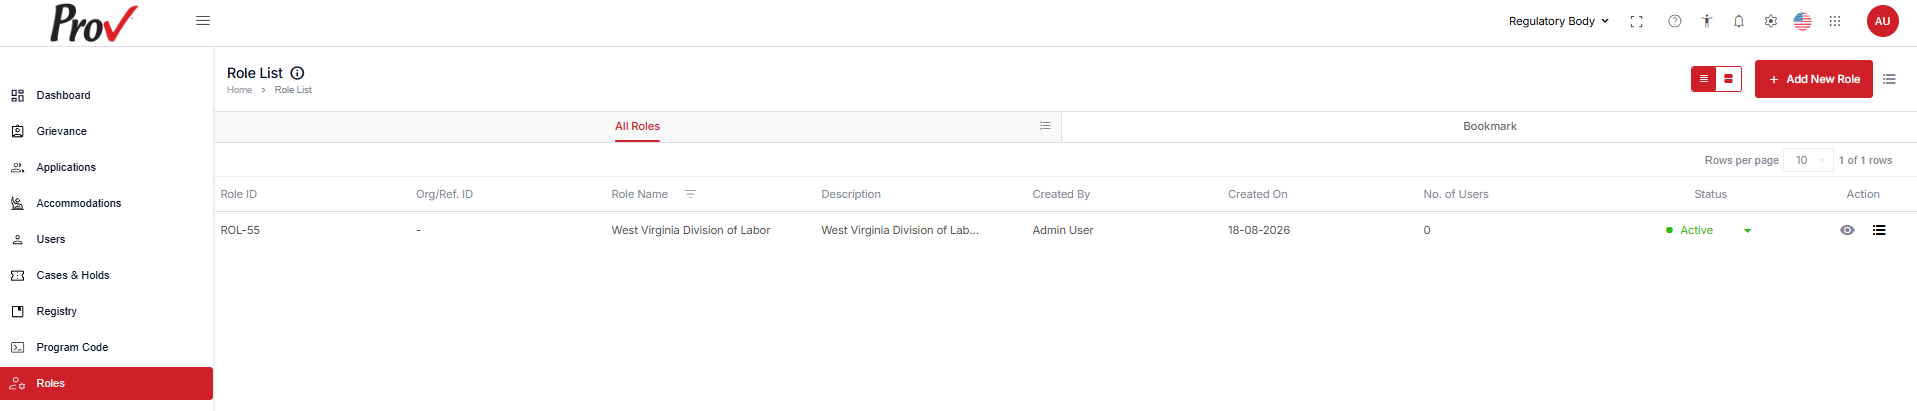
Use the options below to view the customized display of the table items:
- Click the Hamburger menu and open the Customize Display option found on the far right of the title bar to arrange the tab display settings, as needed.
- Select Grid View in the top-right corner of the page to change the display of the same contents.
View Bookmarks
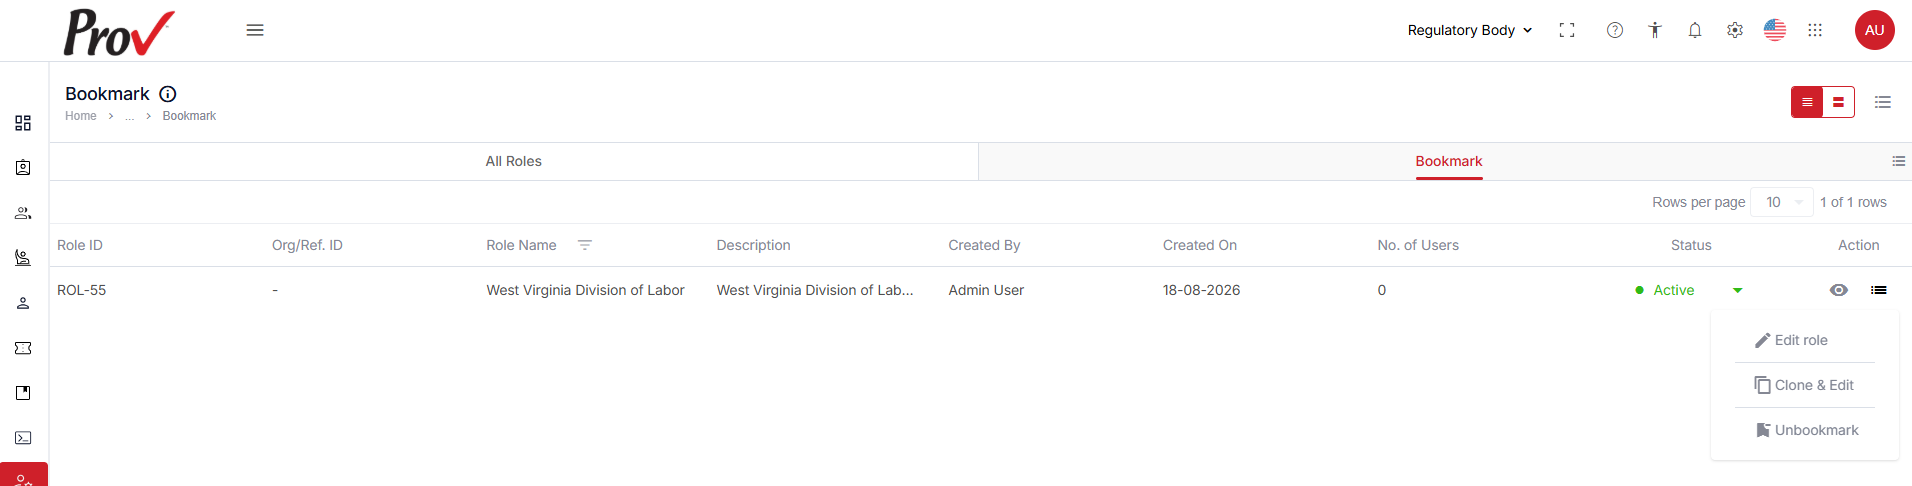
The Bookmark tab displays a list of marked roles for easy reference.
- To access the bookmarked roles, click Bookmark on the Role List page.
- The following are the table items:
- Role ID: Displays the system-generated ID when a new role is created.
- Org/Ref. ID: Displays the organization or the reference ID.
- Role Name: Displays the name of the user who created the role.
- Description: Displays a short description of the role.
- Created By: Displays the name of the person who created the role.
- Created On: Displays the role creation date.
- No. of Users: Displays the number of users assigned to the bookmarked role.
- Status: Displays the status of the role in the bookmark tab.
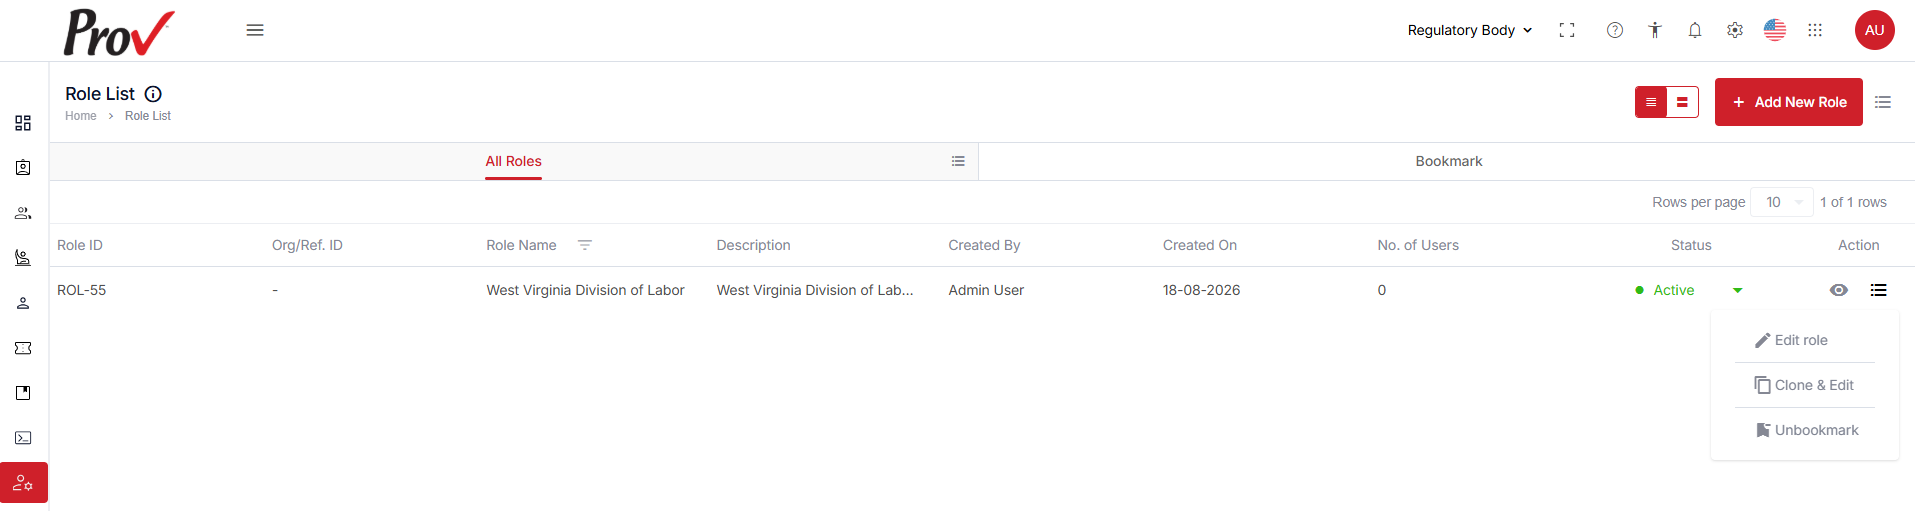
- Action: This column allows you to View, Edit role, Clone & Edit, and Bookmark/Unbookmark the roles.
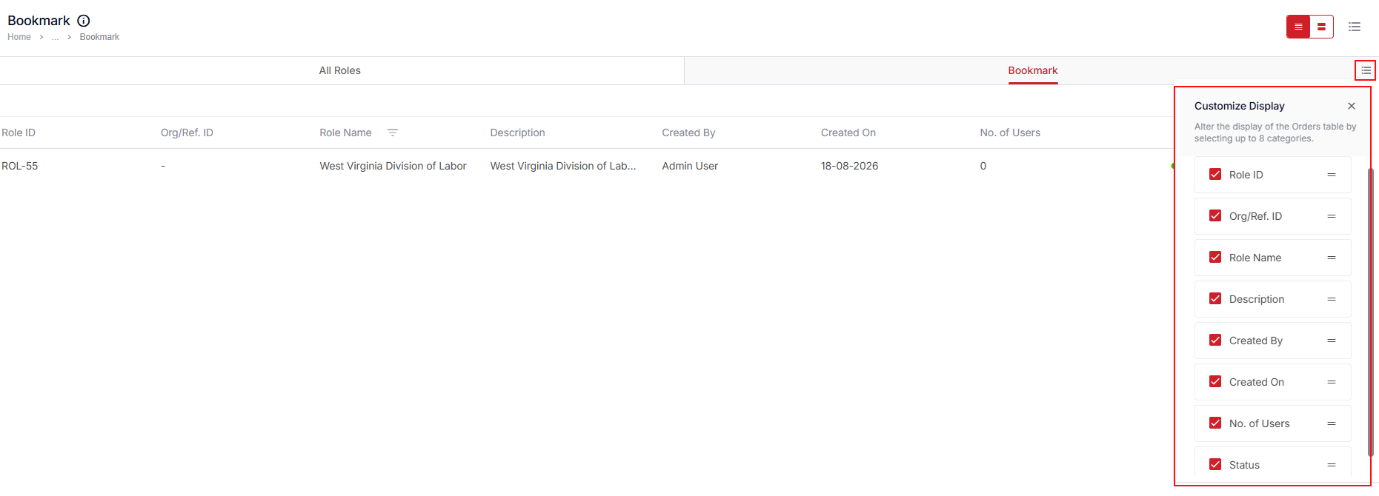
- On the Bookmark tab, use the option below to customize the roles list:
- To view the Customize Display of the table items, click the Hamburger Menu in the right corner of the Bookmark tab and select the required checkbox to display specific column information.
- Select Grid View in the top right corner of the page to change the display of the same contents.
Add New Role
To add a new role, follow the steps below:
- Click Add New Role on the Roles List page to add a new role.
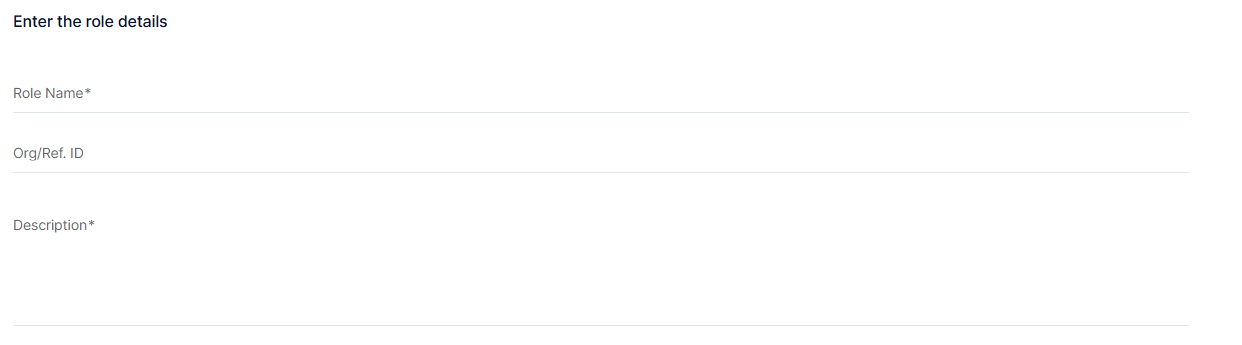
- The Add New Role page is displayed, allowing you to enter all the necessary information to create a new role. Follow the steps below:
- Enter the role details, which include the Role Name, Org/Reg.ID, and Description in the relevant fields.
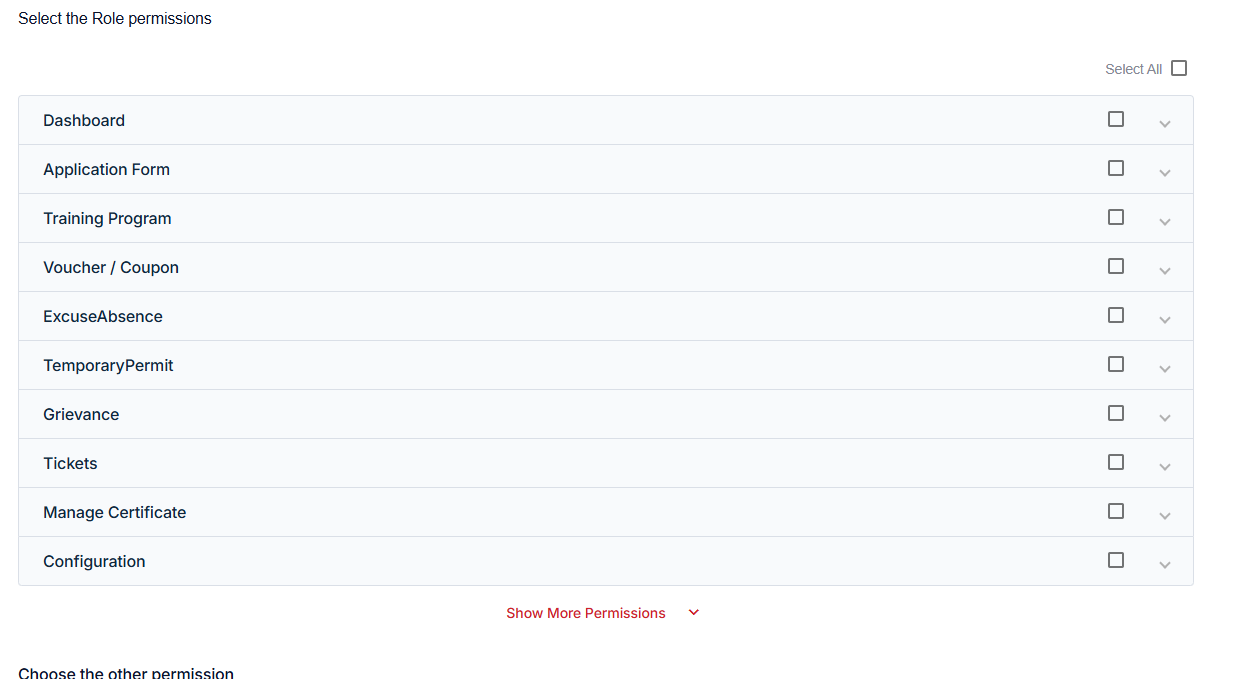
- In the Role Permission section, select the options by marking the required checkboxes to provide access to the selected options.
- Click Show More Permissions to view all available options.
- In the Choose the other permission section, select the options, if required.
- After completing the required details, click Submit to save and create the new role.
- Click Cancel to exit the window.
- Click Cancel to exit the window.

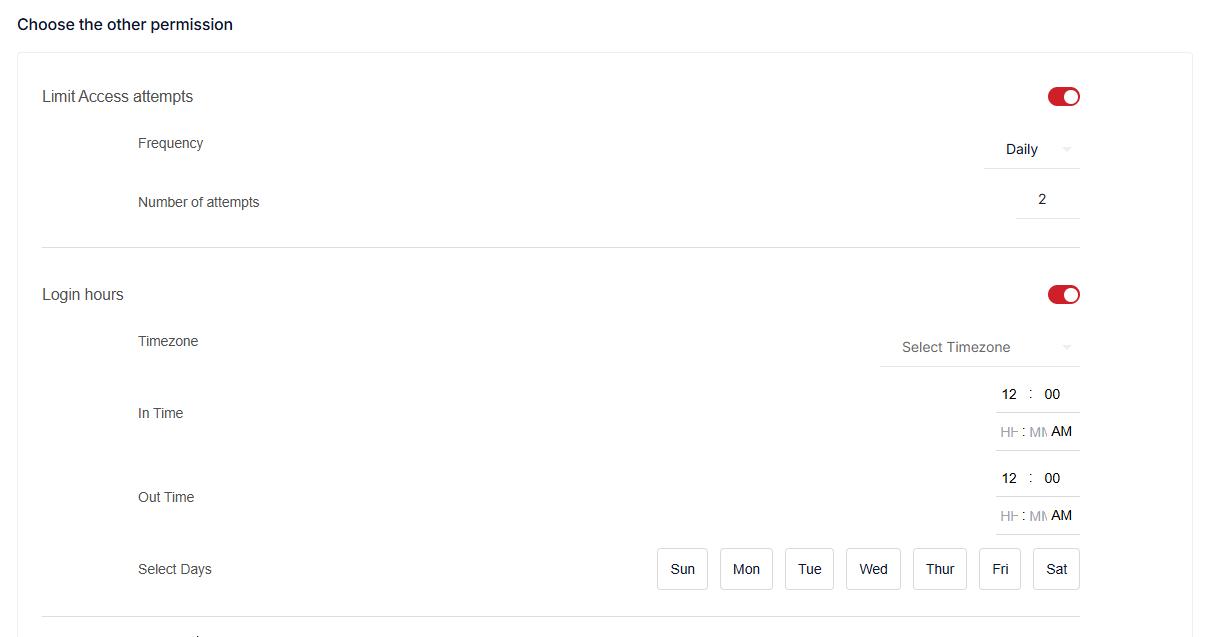
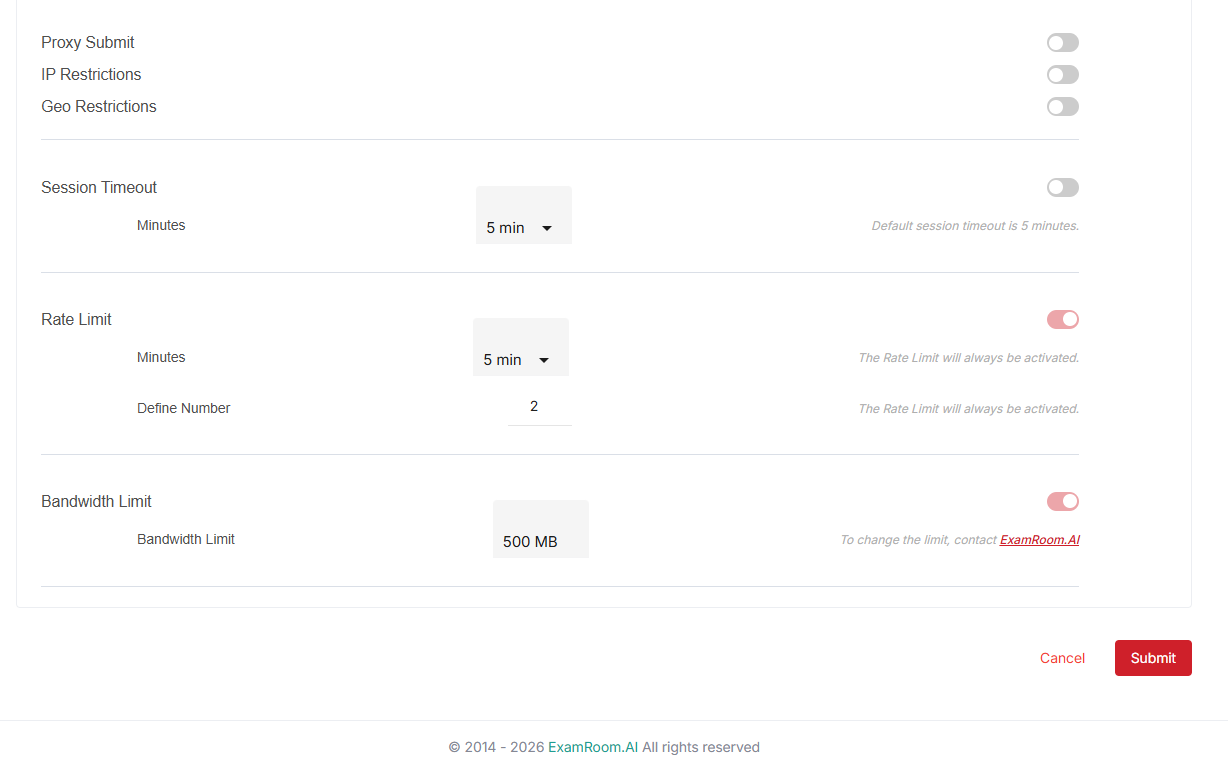
Note: The system does not allow creating multiple roles with the same title and permissions.
Edit Role
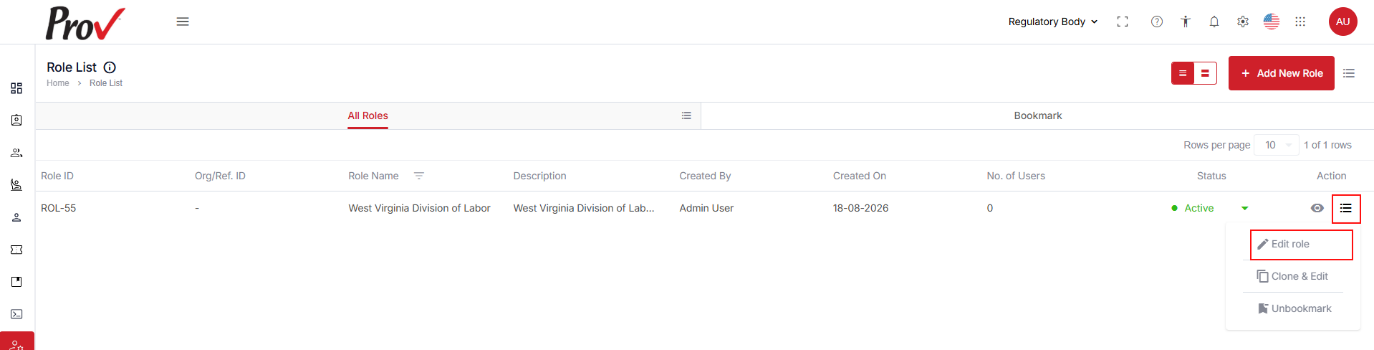
- Click the Hamburger Menu of the Action table column.
- Click Edit to edit the selected role.
- Edit the required information in the Edit Roles fields.
- Once all the fields are edited, click Submit to save the changes.
Note: A success message Role Successfully Edited is displayed in the top-right corner along with the edited role in the list of All Roles.
Clone & Edit
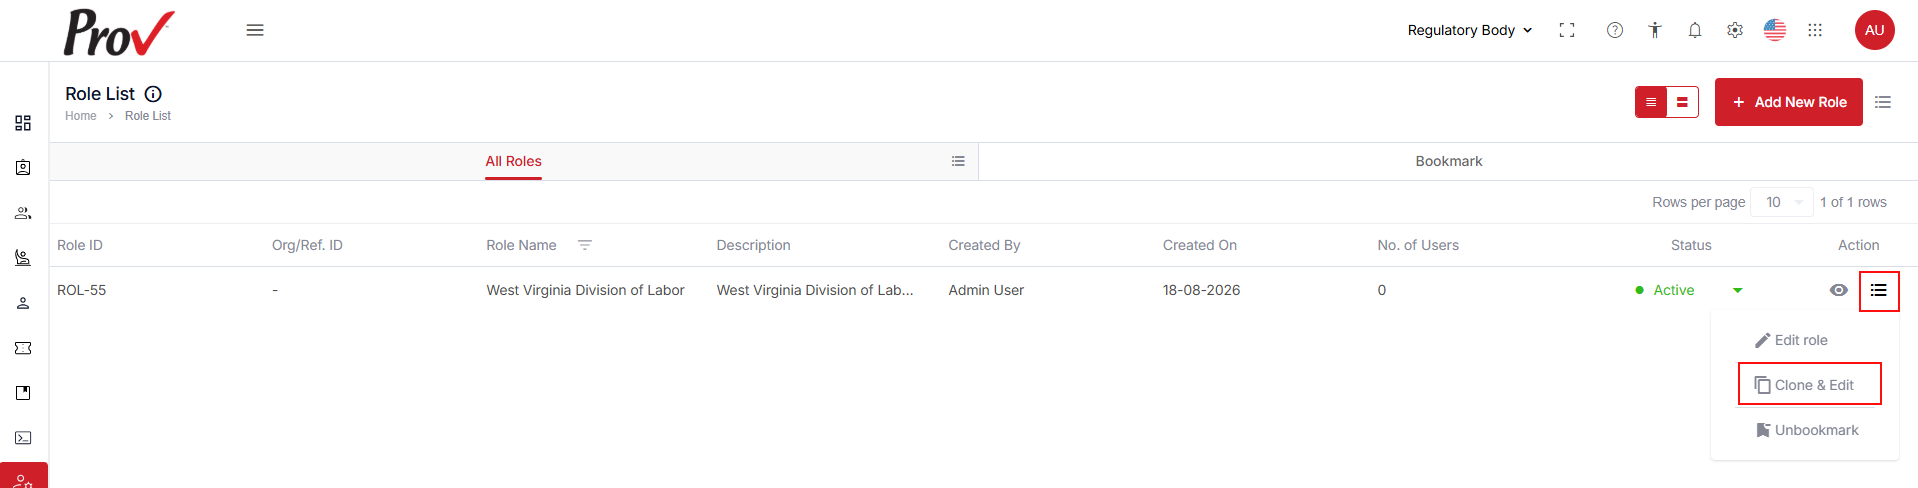
The Clone & Edit option allows you to create a new role by cloning an existing role and modifying its requirements.
To create a new role by cloning, follow these steps:
- On the Role List page, click the Hamburger Menu in the Action column and select Clone & Edit on the selected role.
- You will be directed to the Add New Role page. Follow the steps in Add New Role to add the new role to the console.
Bookmark a Role
To bookmark the roles, follow these steps:
- Click the Hamburger Menu of the Action table column.
- Select Bookmark to bookmark the Role ID and display it under the Bookmark.
- Like All Roles, click on the Hamburger Menu of the Bookmark tab provided beside the bookmark tab header to view the customized display of the bookmark table headers.