Application Forms (Setup)
Application Forms allow you to organize one or more web forms into a structured application process. Forms can be grouped into sections and sub-sections. You can also link or assign workflows and configure role-based permissions.
Follow the steps below to view and manage setting up an application form before configuring the application to a program:
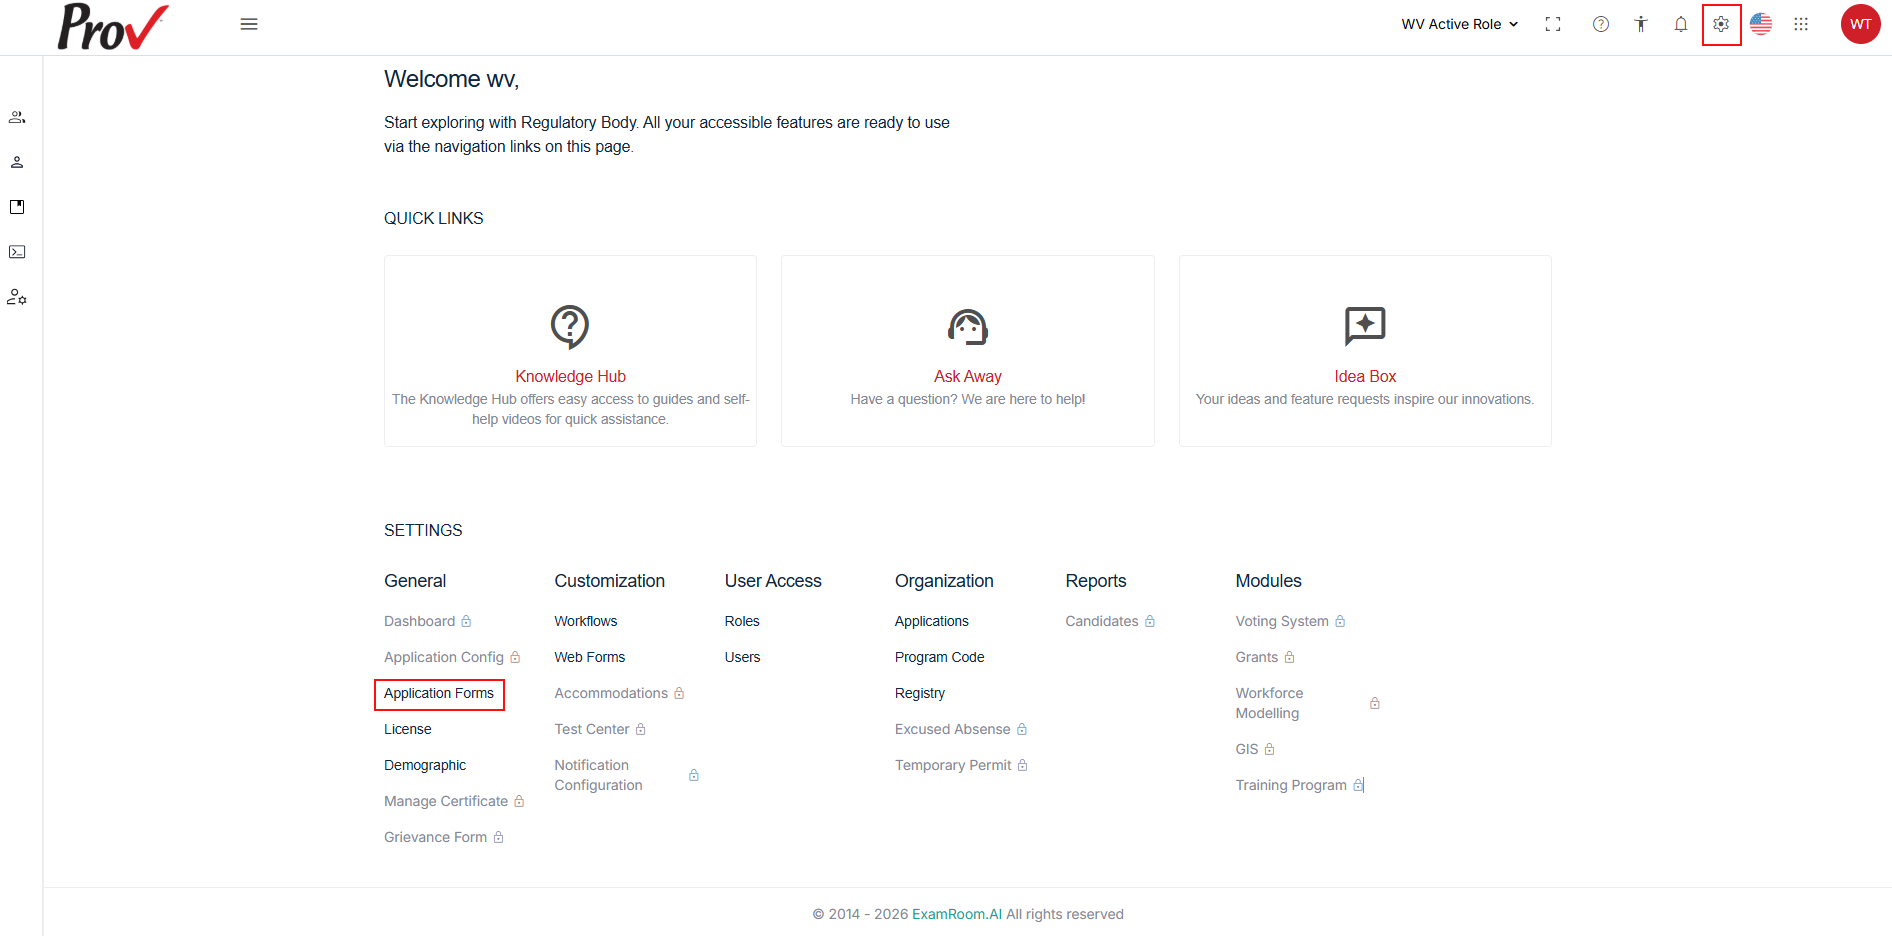
- Navigate to Settings and, under General, select Application Forms.
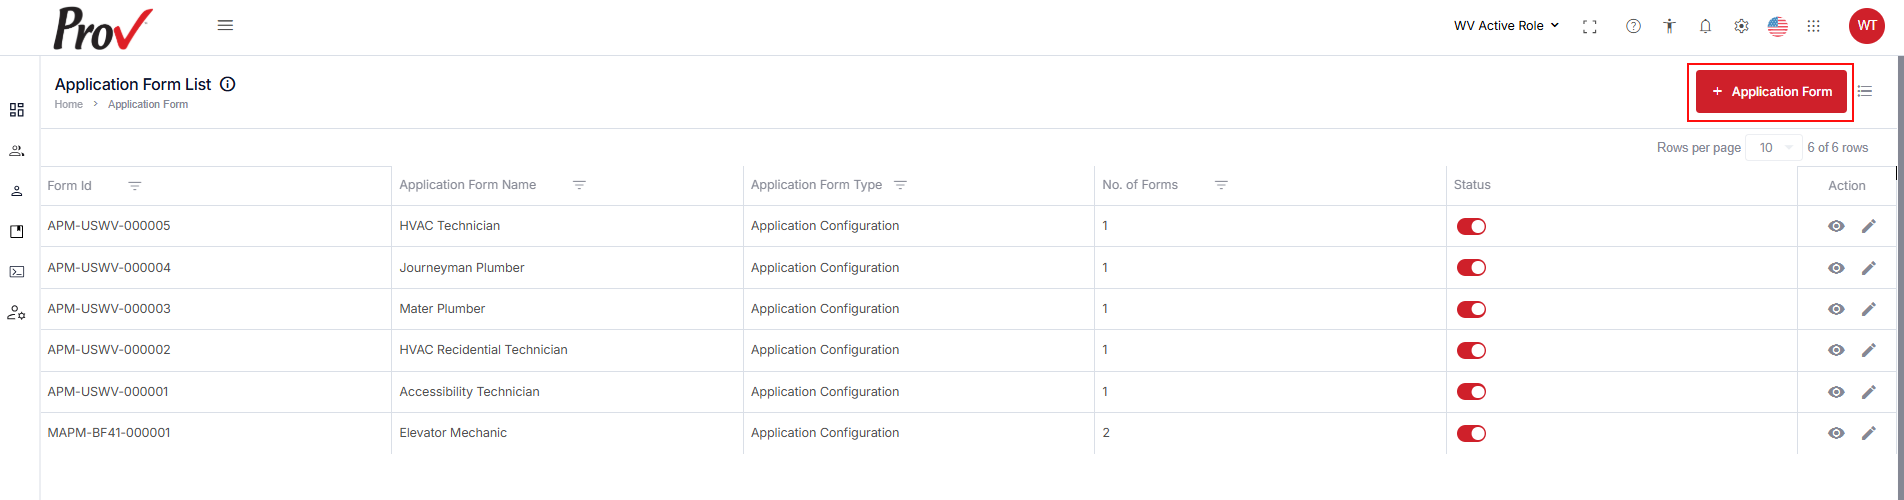
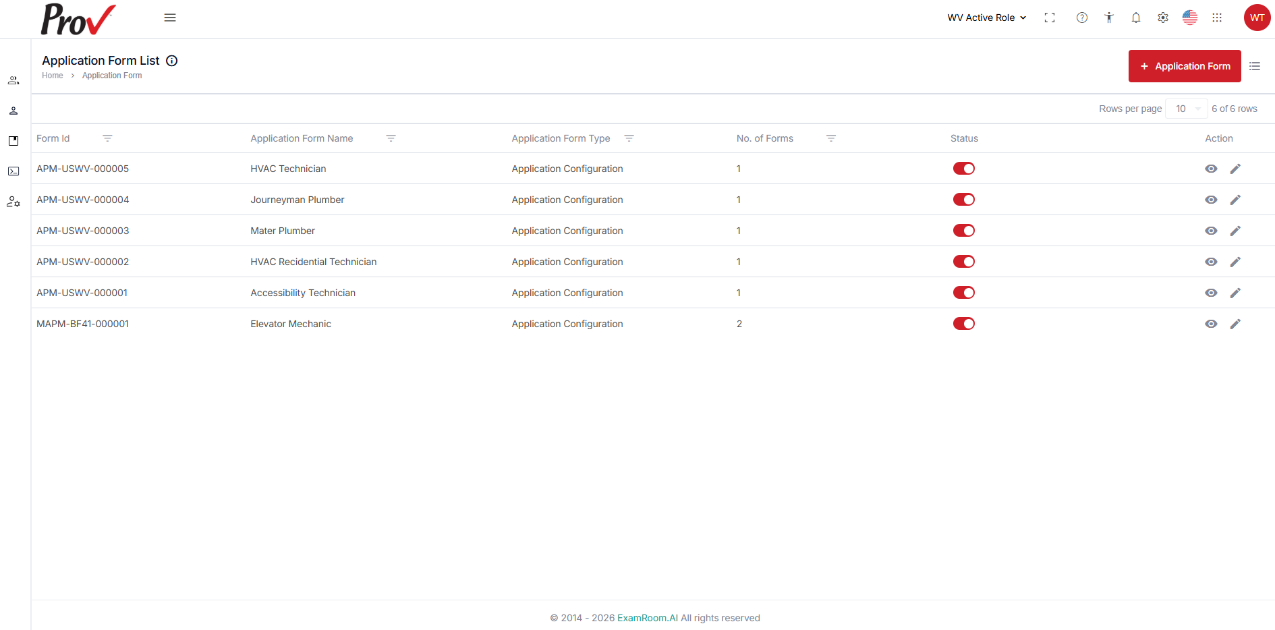
- The Application Form List page displays all existing application forms.
- From this page, administrators can:
- View application forms.
- Edit existing application forms.
- Enable or disable forms using the Status toggle.
- Create a new application form.
- The existing forms are listed in a table format with the following details:
- Form ID: A unique form ID is displayed.
- Application name: The name of the application form is displayed.
- Application Form Type: This section displays the type of application form.
- No. of Forms: The number of web forms added to the application form is listed.
- Status: Toggle on or off to enable or disable the application form.
- Action: Click the View icon and the Edit icon to view or edit the existing Application form.
IMP Note: Application Forms serve as containers for Web Forms. Before creating an Application Form, ensure that all required Web Forms and Workflows have already been configured. This allows sections and sub-sections to be linked correctly during setup.
Create an Application Form
- Go to Settings > select Application Form and click + Application Form.
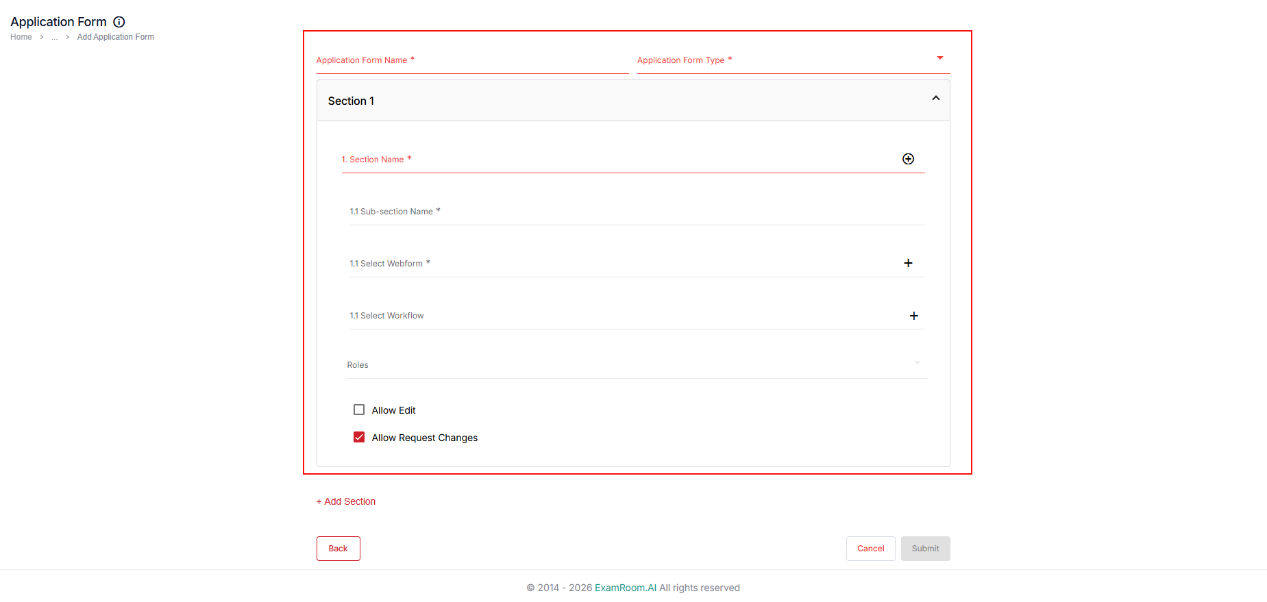
- Enter the following information:
- Application Form name: Enter a unique name for the application form.
- Application Form Type: Select the form type from the dropdown.
- Application forms are organized into sections and sub-sections.
- In Section 1, enter the Section Name.
- Click the + icon to add a sub-section, select web form, and select workflow.
- Select the roles from the dropdown and check the box to provide the required permissions: Allow Edit and Allow Request changes.
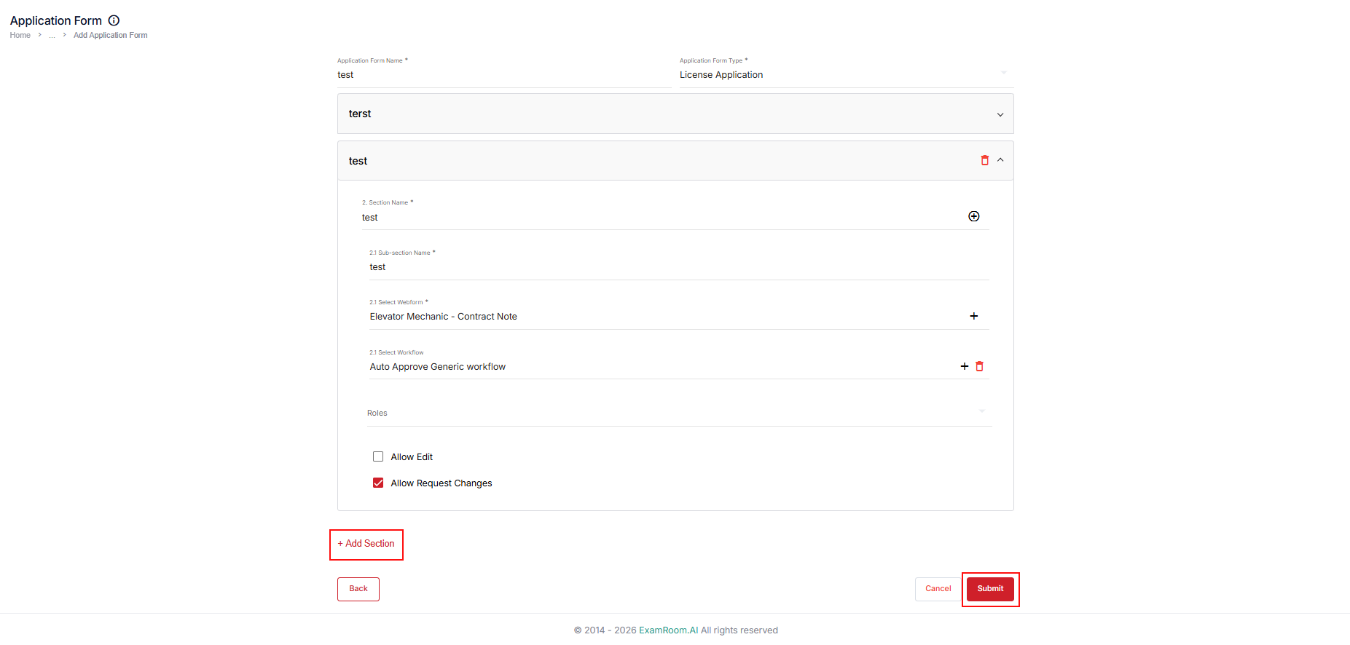
- To create additional sections, click + Add Section at the bottom of the page and follow the same steps above.
- Once all the sections (web forms) are added, click the Submit/Update button to save and submit the form.